
ANALOG HYBRID MIXOutboard Warmth & Digital Precision
INSTANT DOWNLOADDirect Access to Stems & MIDI
THE SONIC MANIFESTO
Headroom Meets Grit
AMM Soundz is an independent sonic laboratory and production house dedicated to raw character, analog headroom, and uncompromising sonic weight. We craft battle-tested sample libraries, precision audio tools, and educational workflows designed to help modern beatmakers and engineers carve their own lane without corporate compromise.
✓ Producer community access & exclusive sample drops
In modern mixing, spatial depth is not simply a matter of splashing wet reverb across an auxiliary send. Achieving true three-dimensional dimensionality requires balancing early reflection patterns, Feedback Delay Networks (FDN), and frequency-dependent decay times without muddying the phantom center.
1. Early Reflections vs. Late Field Reverberation
Early reflections (the first 10 to 50 milliseconds of acoustic returns) provide the brain with vital localization cues regarding room geometry and boundary distance. Late reverberation, on the other hand, provides the emotional tail and sense of environmental warmth.
2. The Hadamard Feedback Delay Matrix
Algorithmic reverbs rely on multi-channel delay networks where energy recirculates through unitary orthogonal matrices (such as Hadamard or Householder matrices). Tuning the feedback matrix coefficients ensures maximum modal density while preventing ringing metallic flutter echoes.
3. The Abbey Road Pre-Delay Trick
Always insert a high-pass filter at 500 Hz and a low-pass filter at 10 kHz directly on your reverb return bus. Coupling this with a tempo-synced pre-delay (typically 1/64th or 1/32nd note, roughly 20-40ms) separates the dry vocal transient from the onset of the reverb tail, preserving vocal presence and punch.
Creating emotive sonic weight in modern indie rock and shoegaze mixes relies heavily on harmonic tension and resolution. By shifting away from standard I-IV-V triads and embracing suspended seconds, modal interchange, and chromatic voice leading, you can transform simple guitar lines into lush, atmospheric soundscapes.
1. The Aeolian / Dorian Shift (i – IV – VI – V)
Moving from a minor tonic directly to a major IV borrows from the Dorian mode, introducing a bright raised 6th before resolving down to the darker submediant (VI). This progression provides an immediate sense of nostalgic yearning often heard in Arctic Monkeys and Interpol tracks.
2. The Lydian Lift (I – II# – IV – I)
By raising the fourth scale degree, the Lydian mode imparts an ethereal, floating quality that keeps listeners suspended in air. Pair this with a dotted-eighth analog delay for maximum spatial bloom.
3. The Chromatic Mediants (I – bVI – I – bIII)
Popularized by 90s shoegaze bands like Slowdive and My Bloody Valentine, chromatic mediants shift chords by thirds outside the diatonic key signature, creating sudden emotional shifts that pull the listener inward.
Production & Tracking Tip
When tracking heavy fuzz or dual humbucker rhythm guitars across these progressions, leave open B and E strings ringing out as a drone pedal tone. This anchors the harmonic shifts while providing natural overtones that sit beautifully below a female lead vocal.
★ AMM Soundz • Music Production Masterclass
Dialing in professional Top 5 Saturation Plugins for Drum Buses is often the deciding factor that separates amateur output from polished, industry-grade releases. In this comprehensive guide, we dissect the signal flow, actionable workflows, and proven strategies needed to master every stage of the process.
⚡ Quick Reference: Top 5 Saturation Plugins for Drum Buses
Core Takeaway: Consistent execution beats over-complication. Master the fundamental parameters before stacking heavy processing.
Difficulty:Intermediate to Advanced
Target Outcome:Cohesive Punch, Warmth & Headroom
Essential Gear:Tape/Tube Saturation, Transient Shaper, Linear Phase EQ
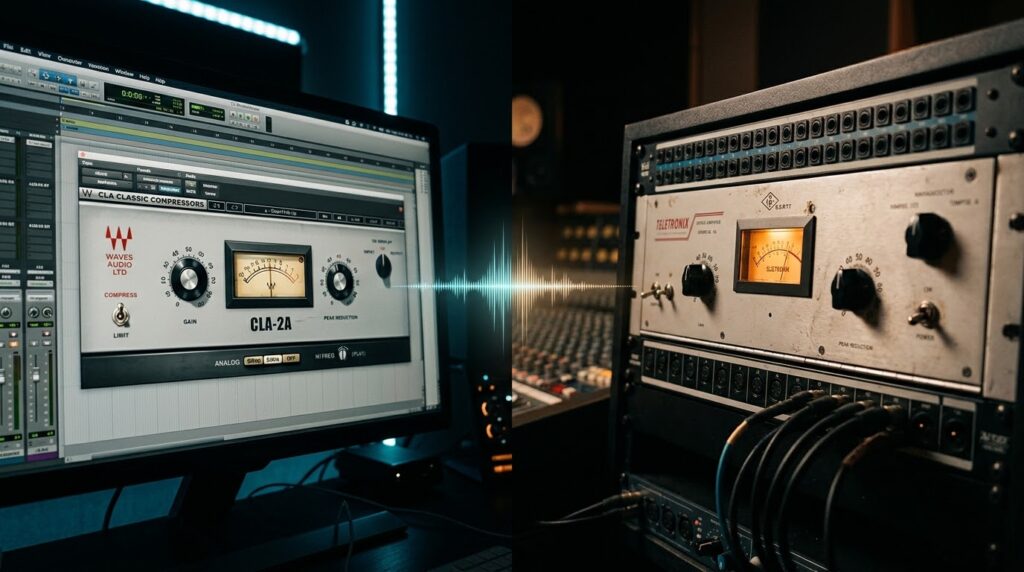
Precision analog mixing desk and outboard gear dialed in for modern drum bus processing.
🎛️ 1. Core Architecture & Signal Flow
When approaching top 5 saturation plugins for drum buses, signal staging is everything. Before adding harmonics or dynamic coloring, inspect your pre-fader levels. A hot mix bus hitting saturation plugins above -3dBFS often induces harsh digital inter-sample distortion rather than warm harmonic coloration.
Start by carving out competing muddy frequencies (typically between 250Hz and 450Hz) using a high-Q subtractive EQ. Clearing this energy leaves pure spectral real estate for saturation harmonics to blossom without generating unwanted clashing frequencies.
“”Clean gain staging upstream guarantees that every unit of saturation you add translates into perceived thickness, not harsh distortion.””
— AMM Soundz Studio Engineering Principles
⚡ 2. Step-by-Step Implementation & Workflow
Follow this calibrated step-by-step procedure to get immediate, high-fidelity results:
Step 1 (Level Match Calibration): Insert your primary processor on the bus with the plugin gain matched within 0.2dB between bypassed and active state.
Step 2 (Harmonic Choice): Select even-order harmonics (triode tube emulation) for creamy low-end density, or odd-order harmonics (tape/transistor) for midrange bite and snap.
Step 3 (Transient Management): If transient punch softens excessively, dial in 10–20% parallel dry signal to retain attack velocity while basking the decay in warmth.
Step 4 (Stereo Width Audit): Verify mono compatibility across the entire mix bus to ensure side-channel saturation hasn’t created phase smearing.
🚀 Pro Mixing Rule: The A/B Blind Test
Always close your eyes and toggle your processing on and off with matching output volume. If it doesn’t sound clearly superior, strip it back.
📊 3. Comparative Breakdown & Parameter Matrix
Tool / Method
Primary Harmonic Profile
Best Application
Recommended Drive
Analog Tape Machine
Subtle Odd Harmonics
Drum bus cohesion & transient softening
-2dB to +1dB VU
Triode Tube Circuit
Rich Even Harmonics
Thickening thin kicks & warm snare body
15% – 25% Blend
FET / Transistor Push
Aggressive Odd Harmonics
Parallel drum crush & aggressive bite
30% – 50% Wet
Digital Clipper
Zero Phase Coloration
Taming rogue snare spikes before limiters
0.5dB – 1.5dB Peak Reduction
Comprehensive comparison matrix for Top 5 Saturation Plugins for Drum Buses processing styles.
💡 4. Pro Secrets & Pitfalls to Avoid
Even seasoned producers fall into recurring mixing traps. Avoid these three common errors:
Over-saturating Sub Frequencies: Avoid saturating sub-bass below 50Hz, which consumes valuable amplifier headroom and causes muddy speaker cone flutter.
Neglecting Oversampling: Always enable at least 2x or 4x oversampling on non-linear processors to eliminate harsh digital foldback aliasing in the 15kHz–20kHz spectrum.
Relying on Presets Unadjusted: Every audio source has unique input impedance and dynamic swing. Always adjust the input drive to match your specific track level.
❓ Frequently Asked Questions
Q: How does top 5 saturation plugins for drum buses affect dynamic headroom in a mix?
Proper processing shaves off unruly peaks and fills out RMS density, which actually increases perceived loudness while preventing sporadic transients from prematurely triggering mastering limiters.
Q: Should I apply processing on individual tracks or the entire drum bus?
Both have their place: use surgical processing on individual tracks (like snares or kicks) to reshape their fundamental envelope, and apply gentle bus-level processing to glue the complete kit together.
Q: What is the most common mistake when dialing in top 5 saturation plugins for drum buses?
The most common mistake is listening with unequal output gain. As saturation increases perceived loudness, our ears naturally prefer the louder signal even if dynamic clarity has been degraded.
Level Up Your AMM Soundz Standard
Ready to take your top 5 saturation plugins for drum buses to the next level? Explore more in-depth masterclasses, share your thoughts below, or connect with our team today.
In an era saturated with digital in-the-box sterility, music producers and audio engineers often struggle to inject character, organic dimension, and warmth into their masters.
At AMM Soundz, our production philosophy hinges on the harmonious synergy between precision analog hardware and modern digital DSP workflows. Whether tracking live guitar voicings or sculpting analog synthesizers, understanding harmonic saturation and transient control is the secret sauce behind radio-ready clarity.
1. Harmonic Saturation vs. Digital Clipping
Unlike digital clipping which generates harsh odd-order harmonics, analog tape machines and tube preamplifiers introduce gentle soft-knee compression and rich even-order harmonic excitement. This expands the perceived loudness of stems without sacrificing crucial head-room.
2. The Multi-Track Stems Workflow
When preparing multitracks for mixing and mastering, maintaining phase coherence across low frequencies (20Hz–120Hz) is vital. Our sound design library is tracked through high-end converters with rigorous phase alignment, ensuring that your kicks, 808s, and analog subs sit solidly in the center of the stereo field.
✦ Producer Takeaway
Don’t over-process individual tracks with surgical EQs before establishing your master bus glue. Use analog tape emulation or tube saturation on subgroups to bind disparate elements into a cohesive sonic landscape.
SELECT A TRACK TO PREVIEW
AMM Soundz Audio Engine
00:00 / 00:00
FREE PRODUCER ACCESS
Join the AMM Soundz Vault
Free access to advanced DSP calculators, canvas stem slicers, harmonic tuners, and exclusive sample kit drops.
PRODUCER LOGIN
Access Your Vault Suite
Sign in to access your unlocked tools, saved presets, and VIP multitrack downloads.